This guide will help you set up SAML SSO to log in to the DMARCwise platform using Keycloak as an identity provider.
To start, you’ll first need to gather some configuration data from the DMARCwise settings:
- In the SSO settings page, click Configure.
- You’ll be provided with two URLs:
- Entity ID
- Assertion Consumer Service (ACS)
- Copy the Entity ID, you’ll need it shortly.
In a separate browser tab:
- Open the Keycloak Administration Console of your organization.
- Navigate to Clients from the sidebar.
- Click on Create client in the Clients list tab.
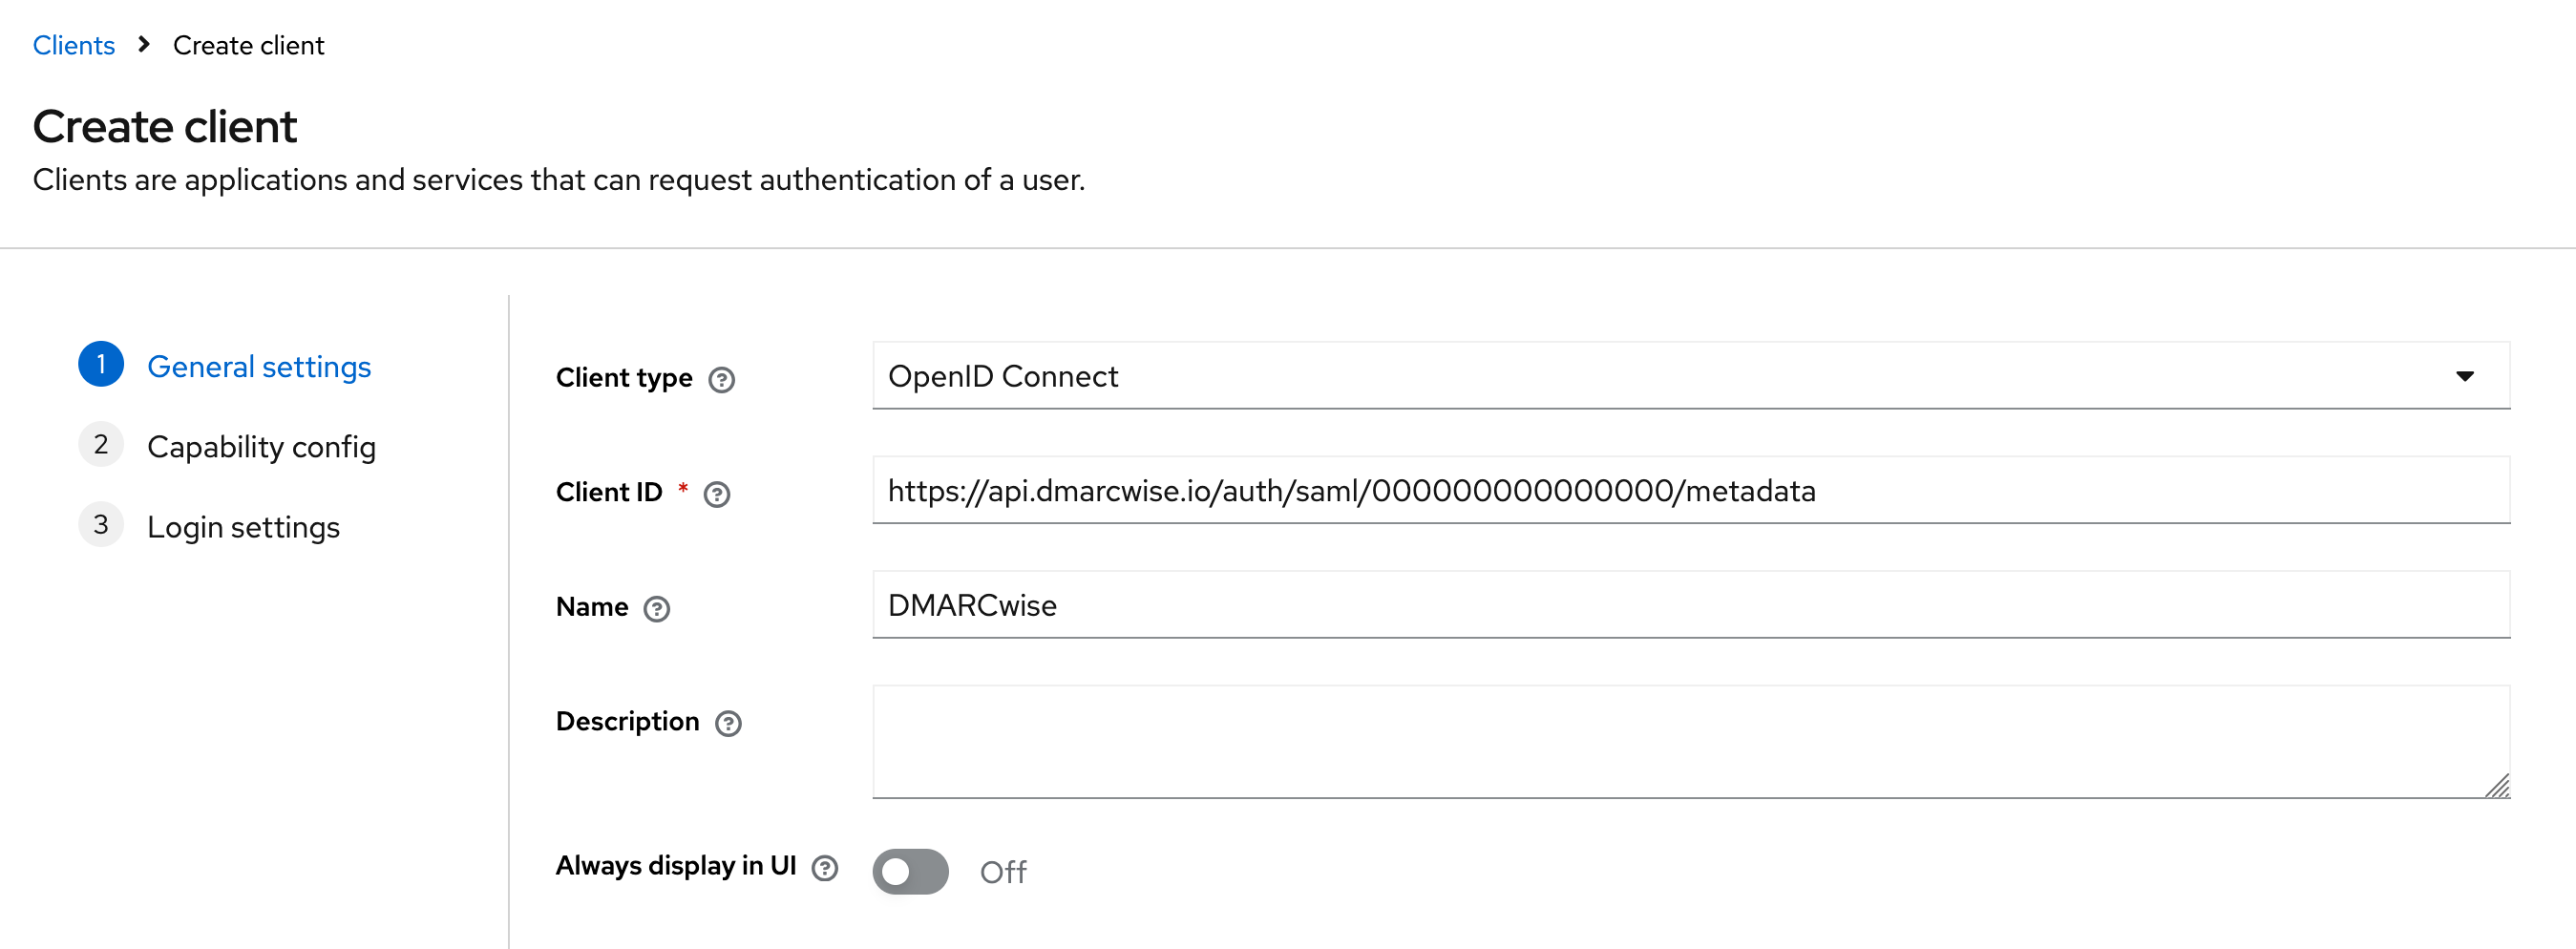
- Choose SAML as the Client type.
- Paste the Entity ID in the Client ID field.
- Type
DMARCwisein the Name field. - Click Next.

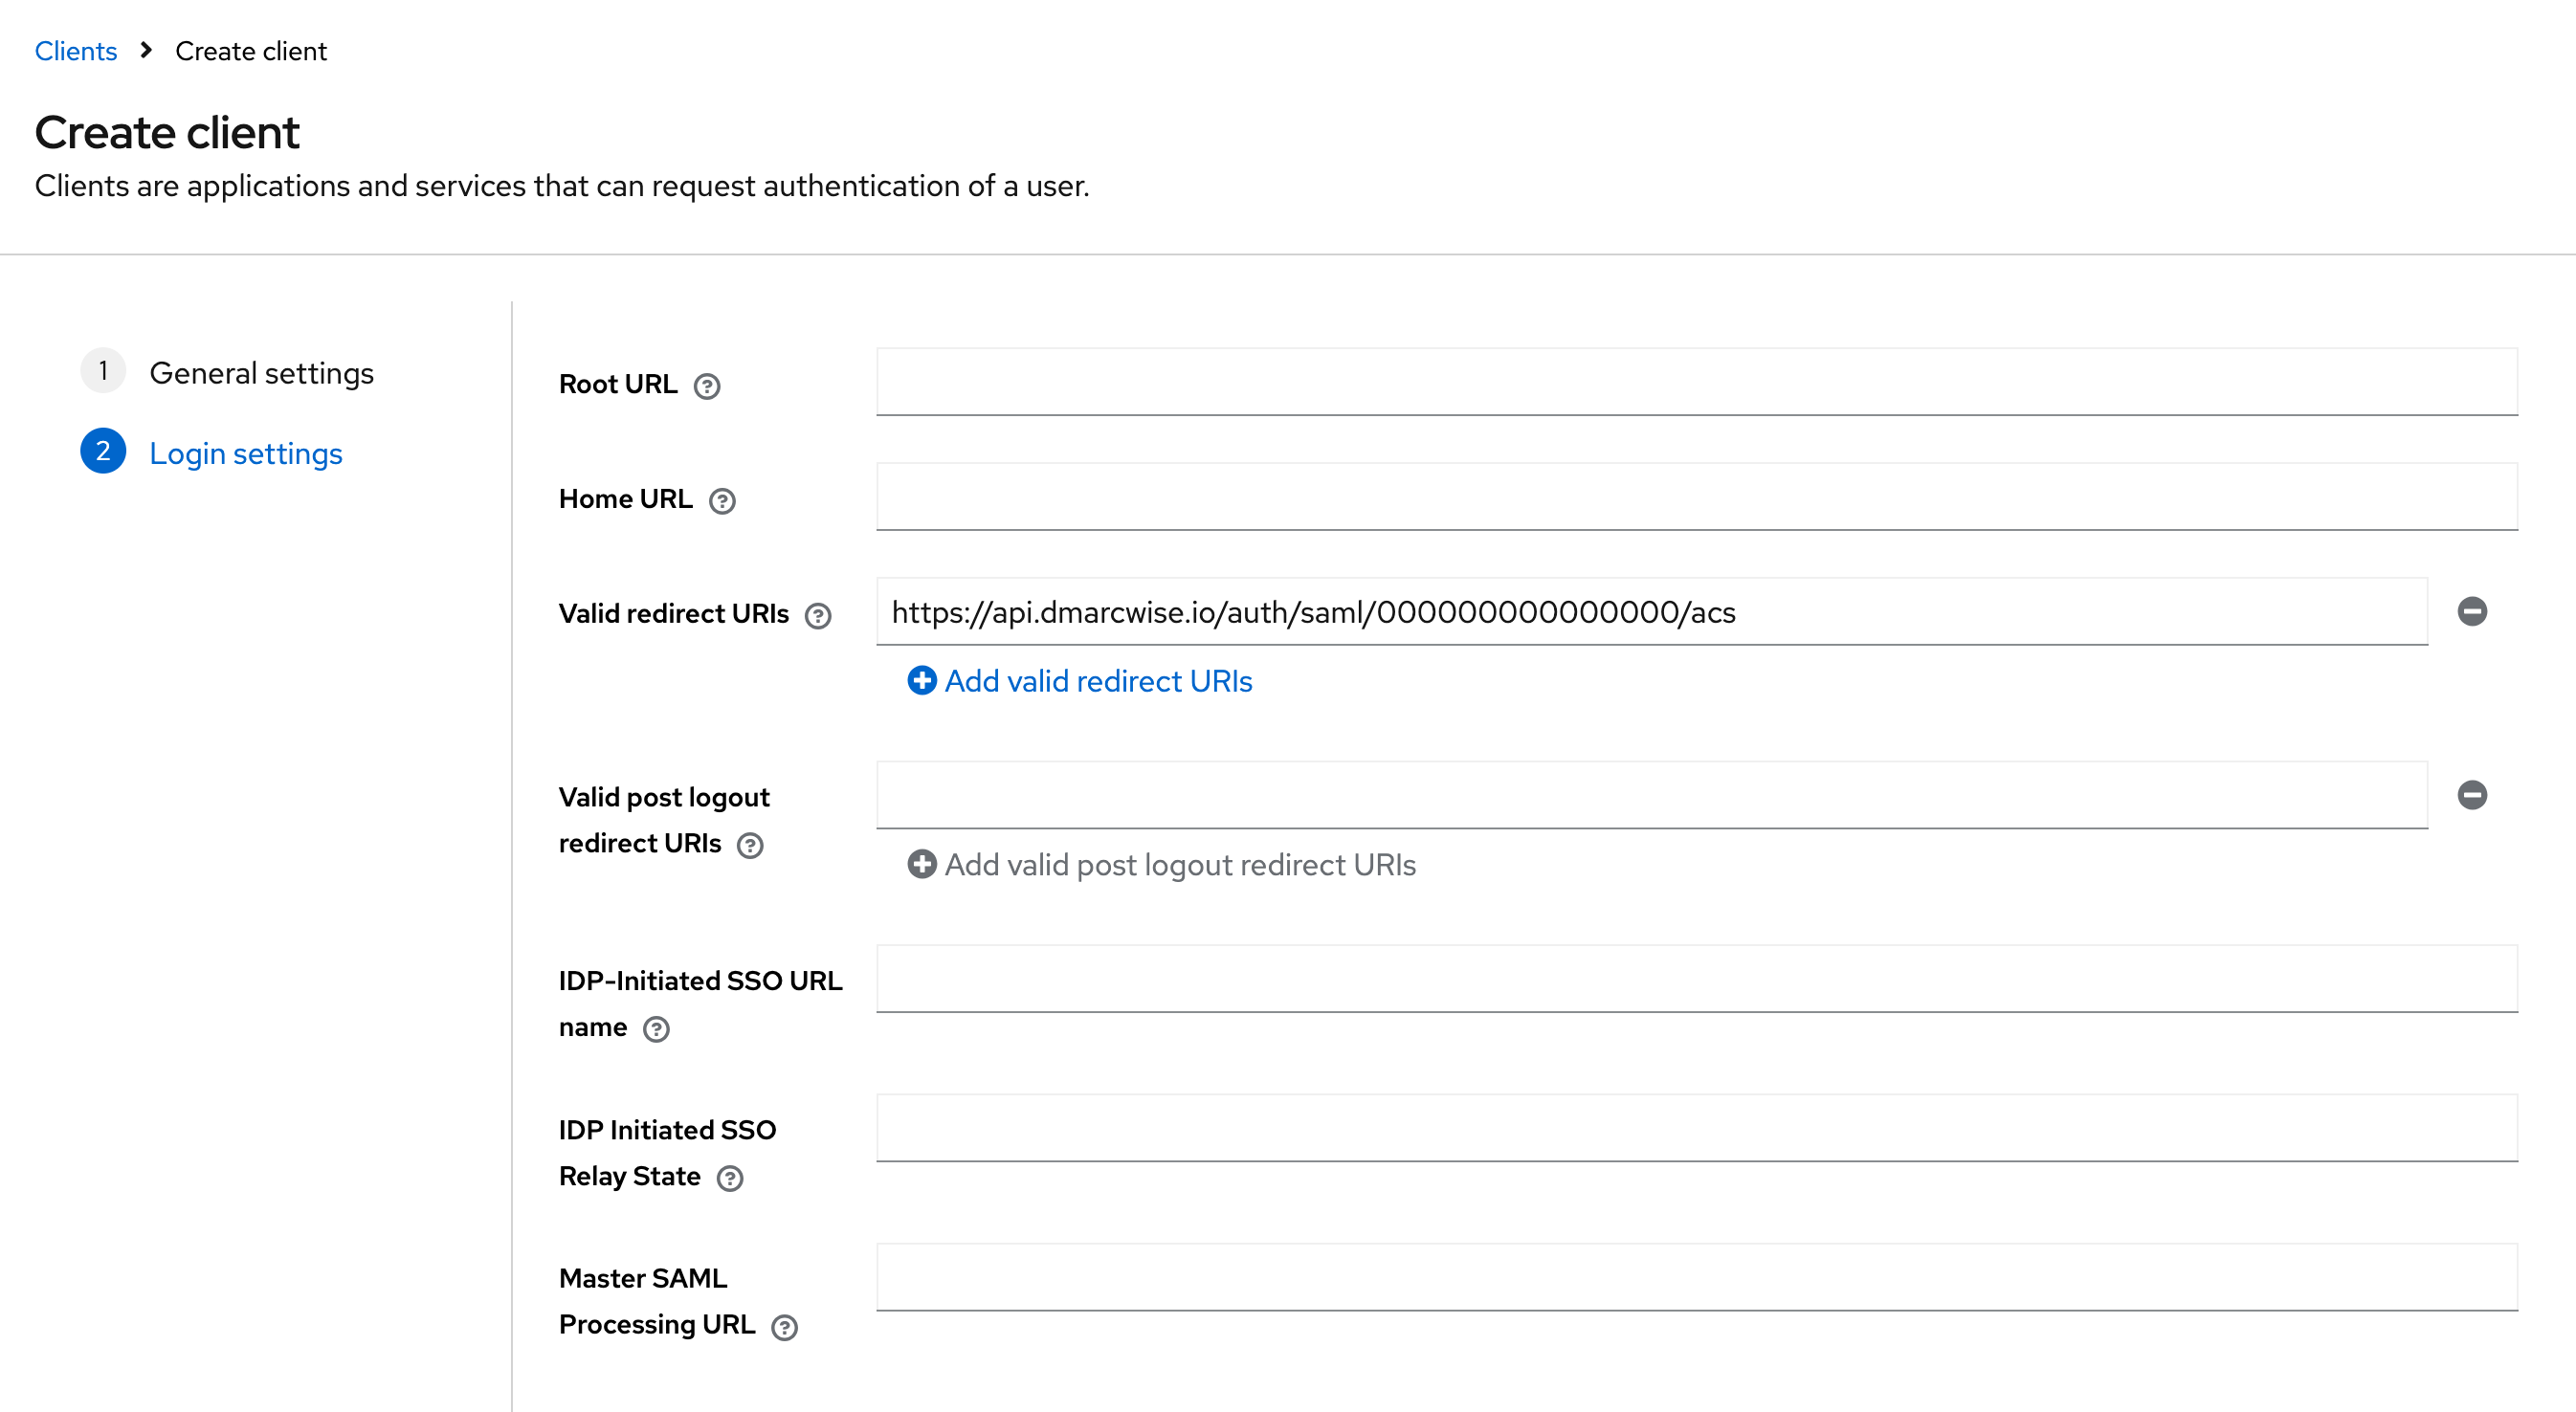
- From the DMARCwise settings, copy the Assertion Consumer Service (ACS) URL and paste it in the Valid redirect URIs field in Keycloak.
- Click Save.

After the Keycloak client is created, you must also change the following options:
- In the Advanced tab, paste the ACS URL you copied earlier in the Assertion Consumer Service POST Binding URL and Save.
- In the Keys tab, change the Client signature required toggle so that it’s set to Off.
- In the Client scopes tab, click the item in the list that has the text Dedicated scope and mappers for this client in the description column.
- Click Add predefined mapper.
- In the list, check X500 email, X500 givenName and x500 surname.
- Click Add.
You’ll now need to gather the Keycloak SAML metadata URL for the realm in order to enable SSO in DMARCwise:
- In the Keycloak sidebar, navigate to Realm settings.
- At the bottom of the page, copy the URL of the link for SAML 2.0 Identity Provider Metadata.

Now, back to the DMARCwise SSO setup page, which you left at step 1:
- Click Next to proceed to step 2.
- Paste the URL for SAML 2.0 Identity Provider Metadata in the Metadata URL field.
- Click Enable SSO.
As an optional last step, you can configure the Home URL of the Keycloak client with the Login URL that you find in the DMARCwise SSO setup page.
Find more information about testing and enforcing SSO in Setting up SSO.
Setting up application roles
You can set up Keycloak to pass an application role to DMARCwise by using the urn:dmarcwise:role custom SAML attribute. When combined with the Require a valid role attribute setting (see below) this feature can also be used for access control.
There are mainly two possible strategies:
- Set up a DMARCwise-specific group with child groups corresponding to DMARCwise roles in Keycloak, and then pass all the assigned groups in the custom SAML attribute. You must make sure that there are no other groups named like DMARCwise roles to avoid conflicts.
- Assign a user profile attribute and set up Keycloak to pass the attribute as the custom SAML attribute to DMARCwise.
In all cases, if you pass multiple values for the role attribute we’ll pick the one with the highest level of permissions.
If you’d like to go with groups:
- In Groups, create a new group named
dmarcwise. Then, create child groups for each of the following supported roles:AdminMemberBillingViewer
- Assign the users to the corresponding child group based on the role you’d like them to have.
- In Clients, choose the DMARCwise client, navigate to the Client scopes tab and click the item in the list that has the text Dedicated scope and mappers for this client in the description column.
- Click Add mapper → By configuration and choose Group list from the list.
- In Name, type “DMARCwise role mapper”.
- In Group attribute name, type
urn:dmarcwise:role. - Leave Friendly Name empty and disable Full group path.
- Click Save.
- DMARCwise will assign and sync the role when users log in with SSO.
If you’d like to use the profile attribute:
- Configure a new user profile attribute named
dmarcwiseRole(or similar) in Realm settings → User profile. If you want, give it a Display name of “DMARCwise role” (or similar). - In Users, choose a user for which you want to set the DMARCwise role and type in the role name as the value of the attribute you just created. The following roles are supported:
AdminMemberBillingViewer
- In Clients, choose the DMARCwise client, navigate to the Client scopes tab and click the item in the list that has the text Dedicated scope and mappers for this client in the description column.
- Click Add mapper → By configuration and choose User Attribute from the list.
- In Name, type “Role”.
- In User Attribute, choose
dmarcwiseRoleor the name you gave to the attribute. - In SAML Attribute Name, type
urn:dmarcwise:role. - Click Save.
- DMARCwise will assign and sync the role when users log in with SSO.
Access control
Since Keycloak doesn’t provide an easy way to restrict who can use a client out of the box, you can set up roles and enforce their presence so that users without a role explicitly assigned won’t be able to log in to DMARCwise.
To do so, set up roles as mentioned in the previous section.
Then, enable the setting named Require valid role attribute in the DMARCwise SSO settings page.
