This guide will help you set up SAML SSO to log in to the DMARCwise platform using Google Workspace as an identity provider.
To start, you’ll first need to gather some configuration data from the DMARCwise settings:
- In the SSO settings page, click Configure.
- You’ll be provided with two URLs:
- Entity ID
- Assertion Consumer Service (ACS)
In a separate browser tab:
Open the Google Workspace admin console.
Navigate to Apps → Web and mobile apps from the sidebar.
Click on Add app and then Add custom SAML app.
Enter DMARCwise as the App name and click Continue.
Skip the second step (Google Identity Provider details) by clicking Continue (you’ll gather this information later).
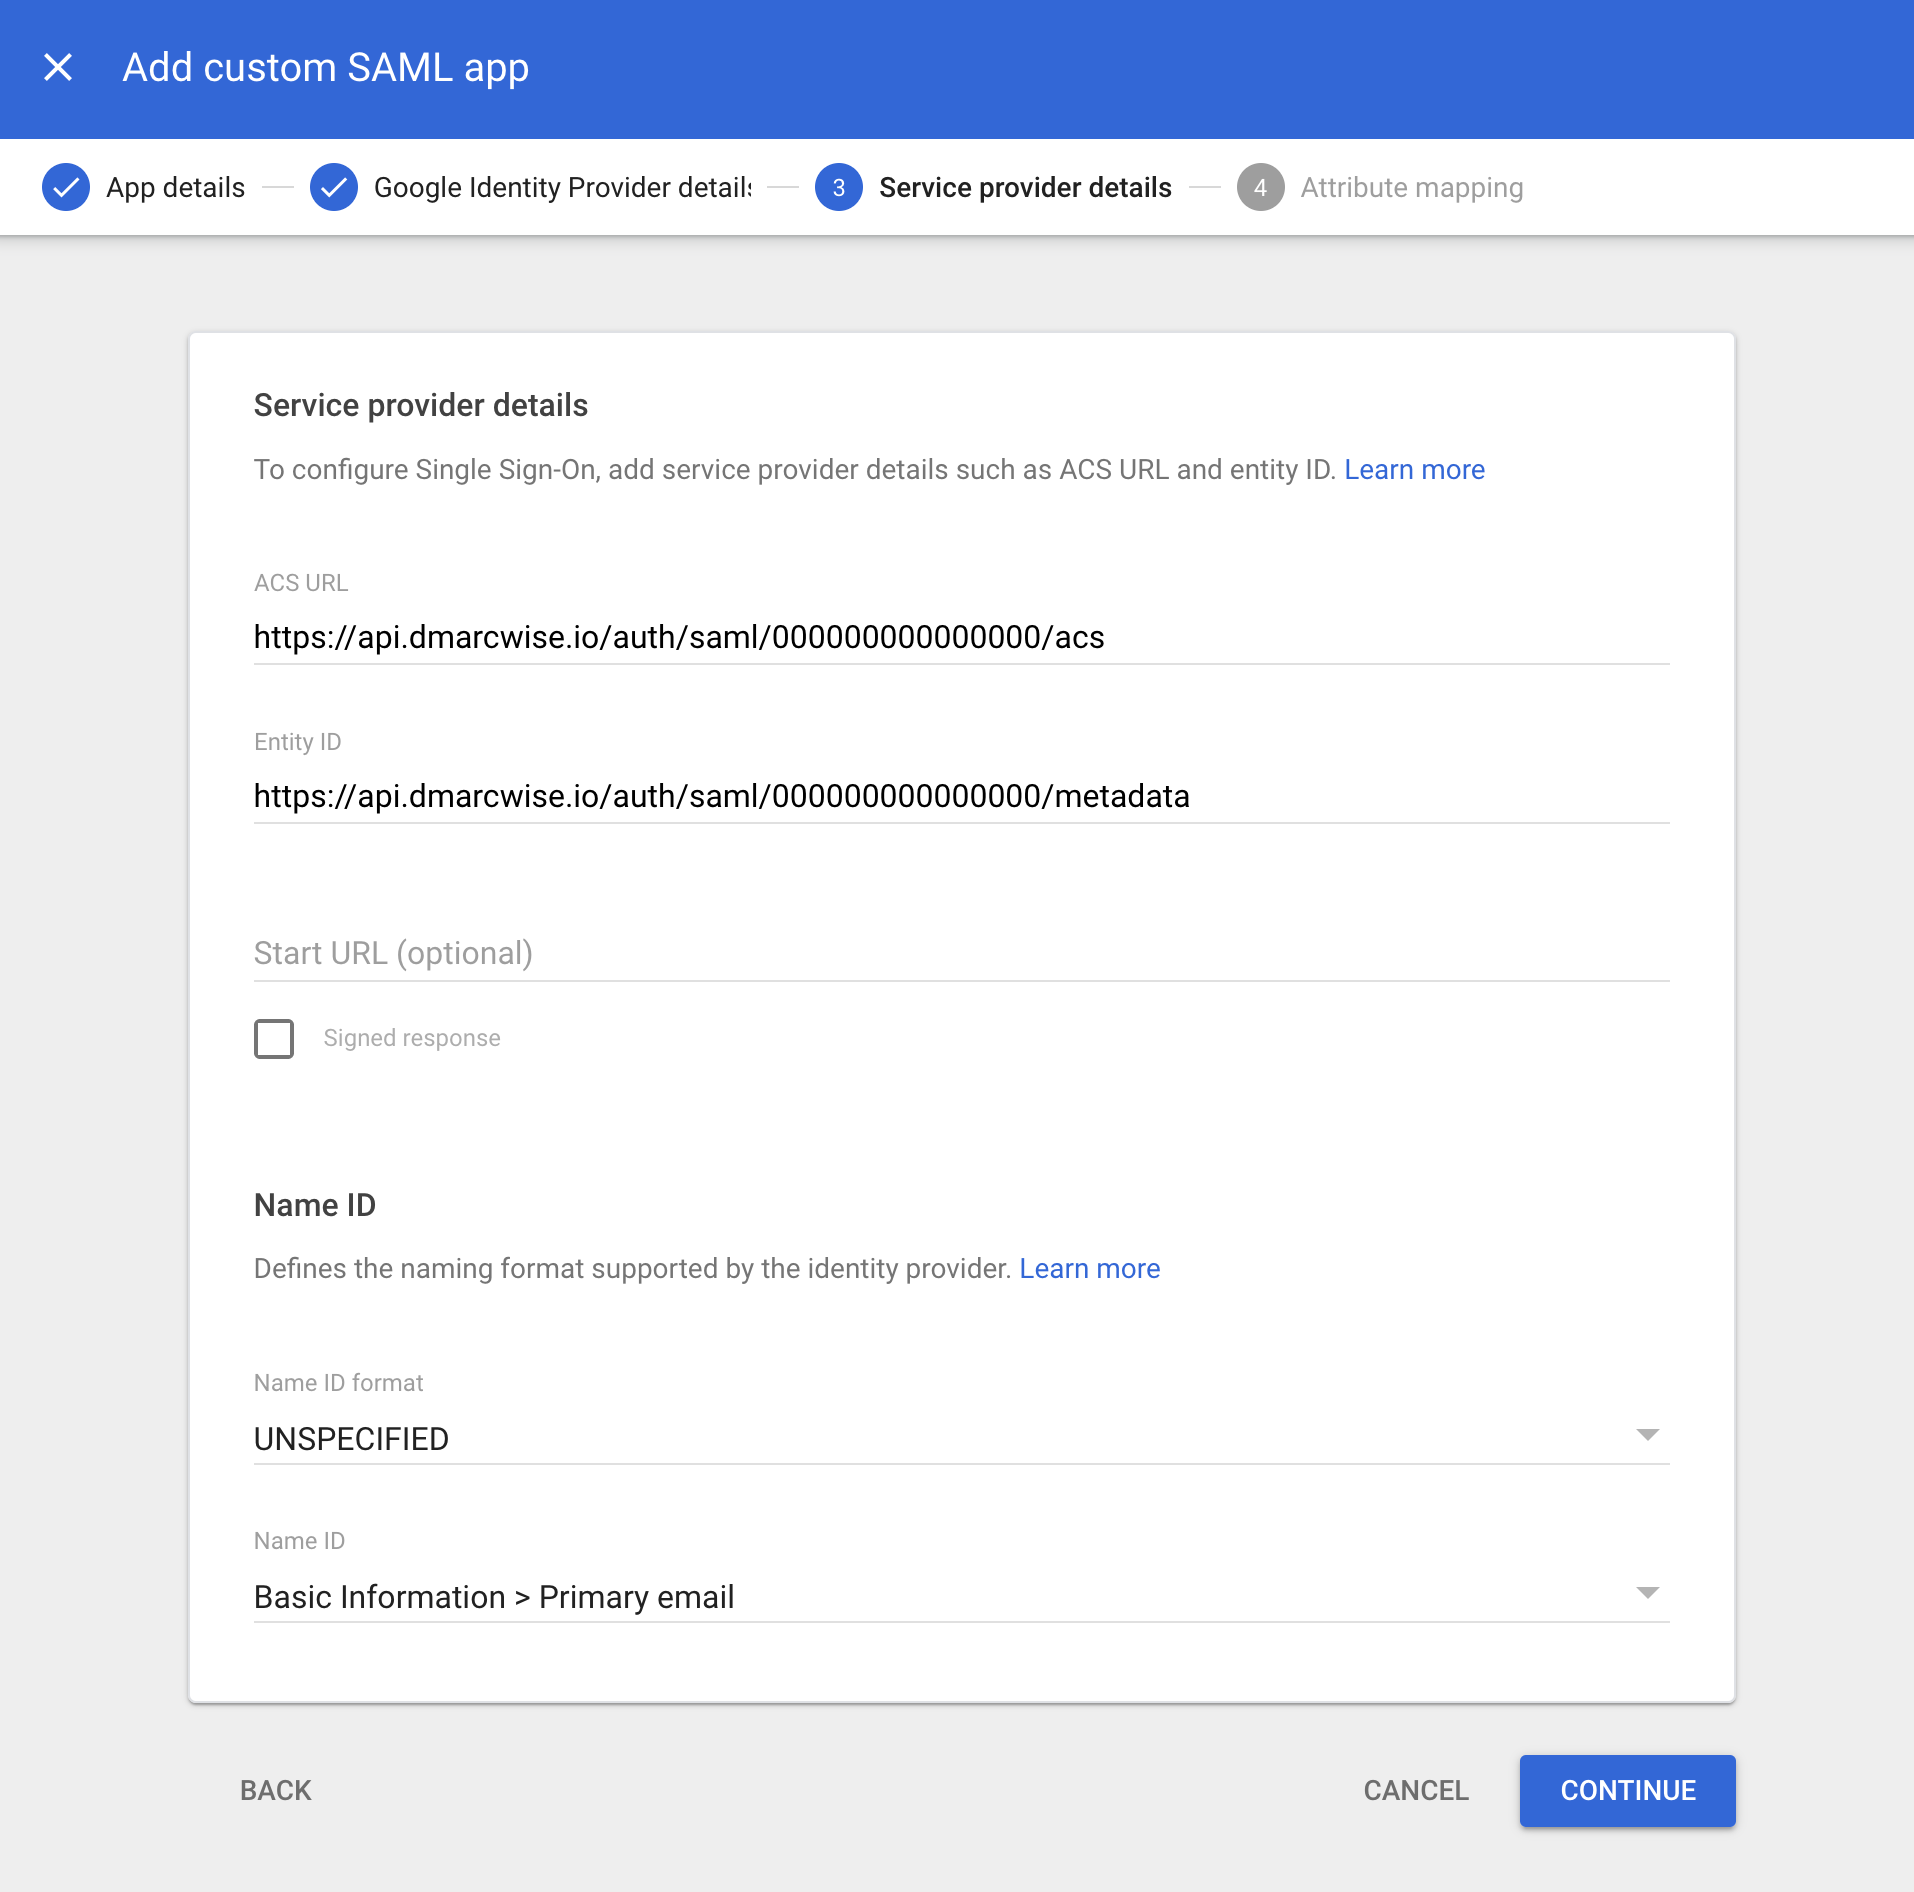
In the Service provider details step, enter the following information:
- In the ACS URL field, paste the Assertion Consumer Service (ACS) URL from the DMARCwise settings.
- In the Entity ID, paste the Entity ID from the DMARCwise settings.
If the users in your Google Workspace directory have a unique ID attribute like an employee ID set up, choose that attribute as the Name ID and change the Name ID format to
PERSISTENT. Otherwise, leave the default configuration unchanged. Learn more about what this means in practice in the corresponding section of the main SSO docs page.

- Click Continue.
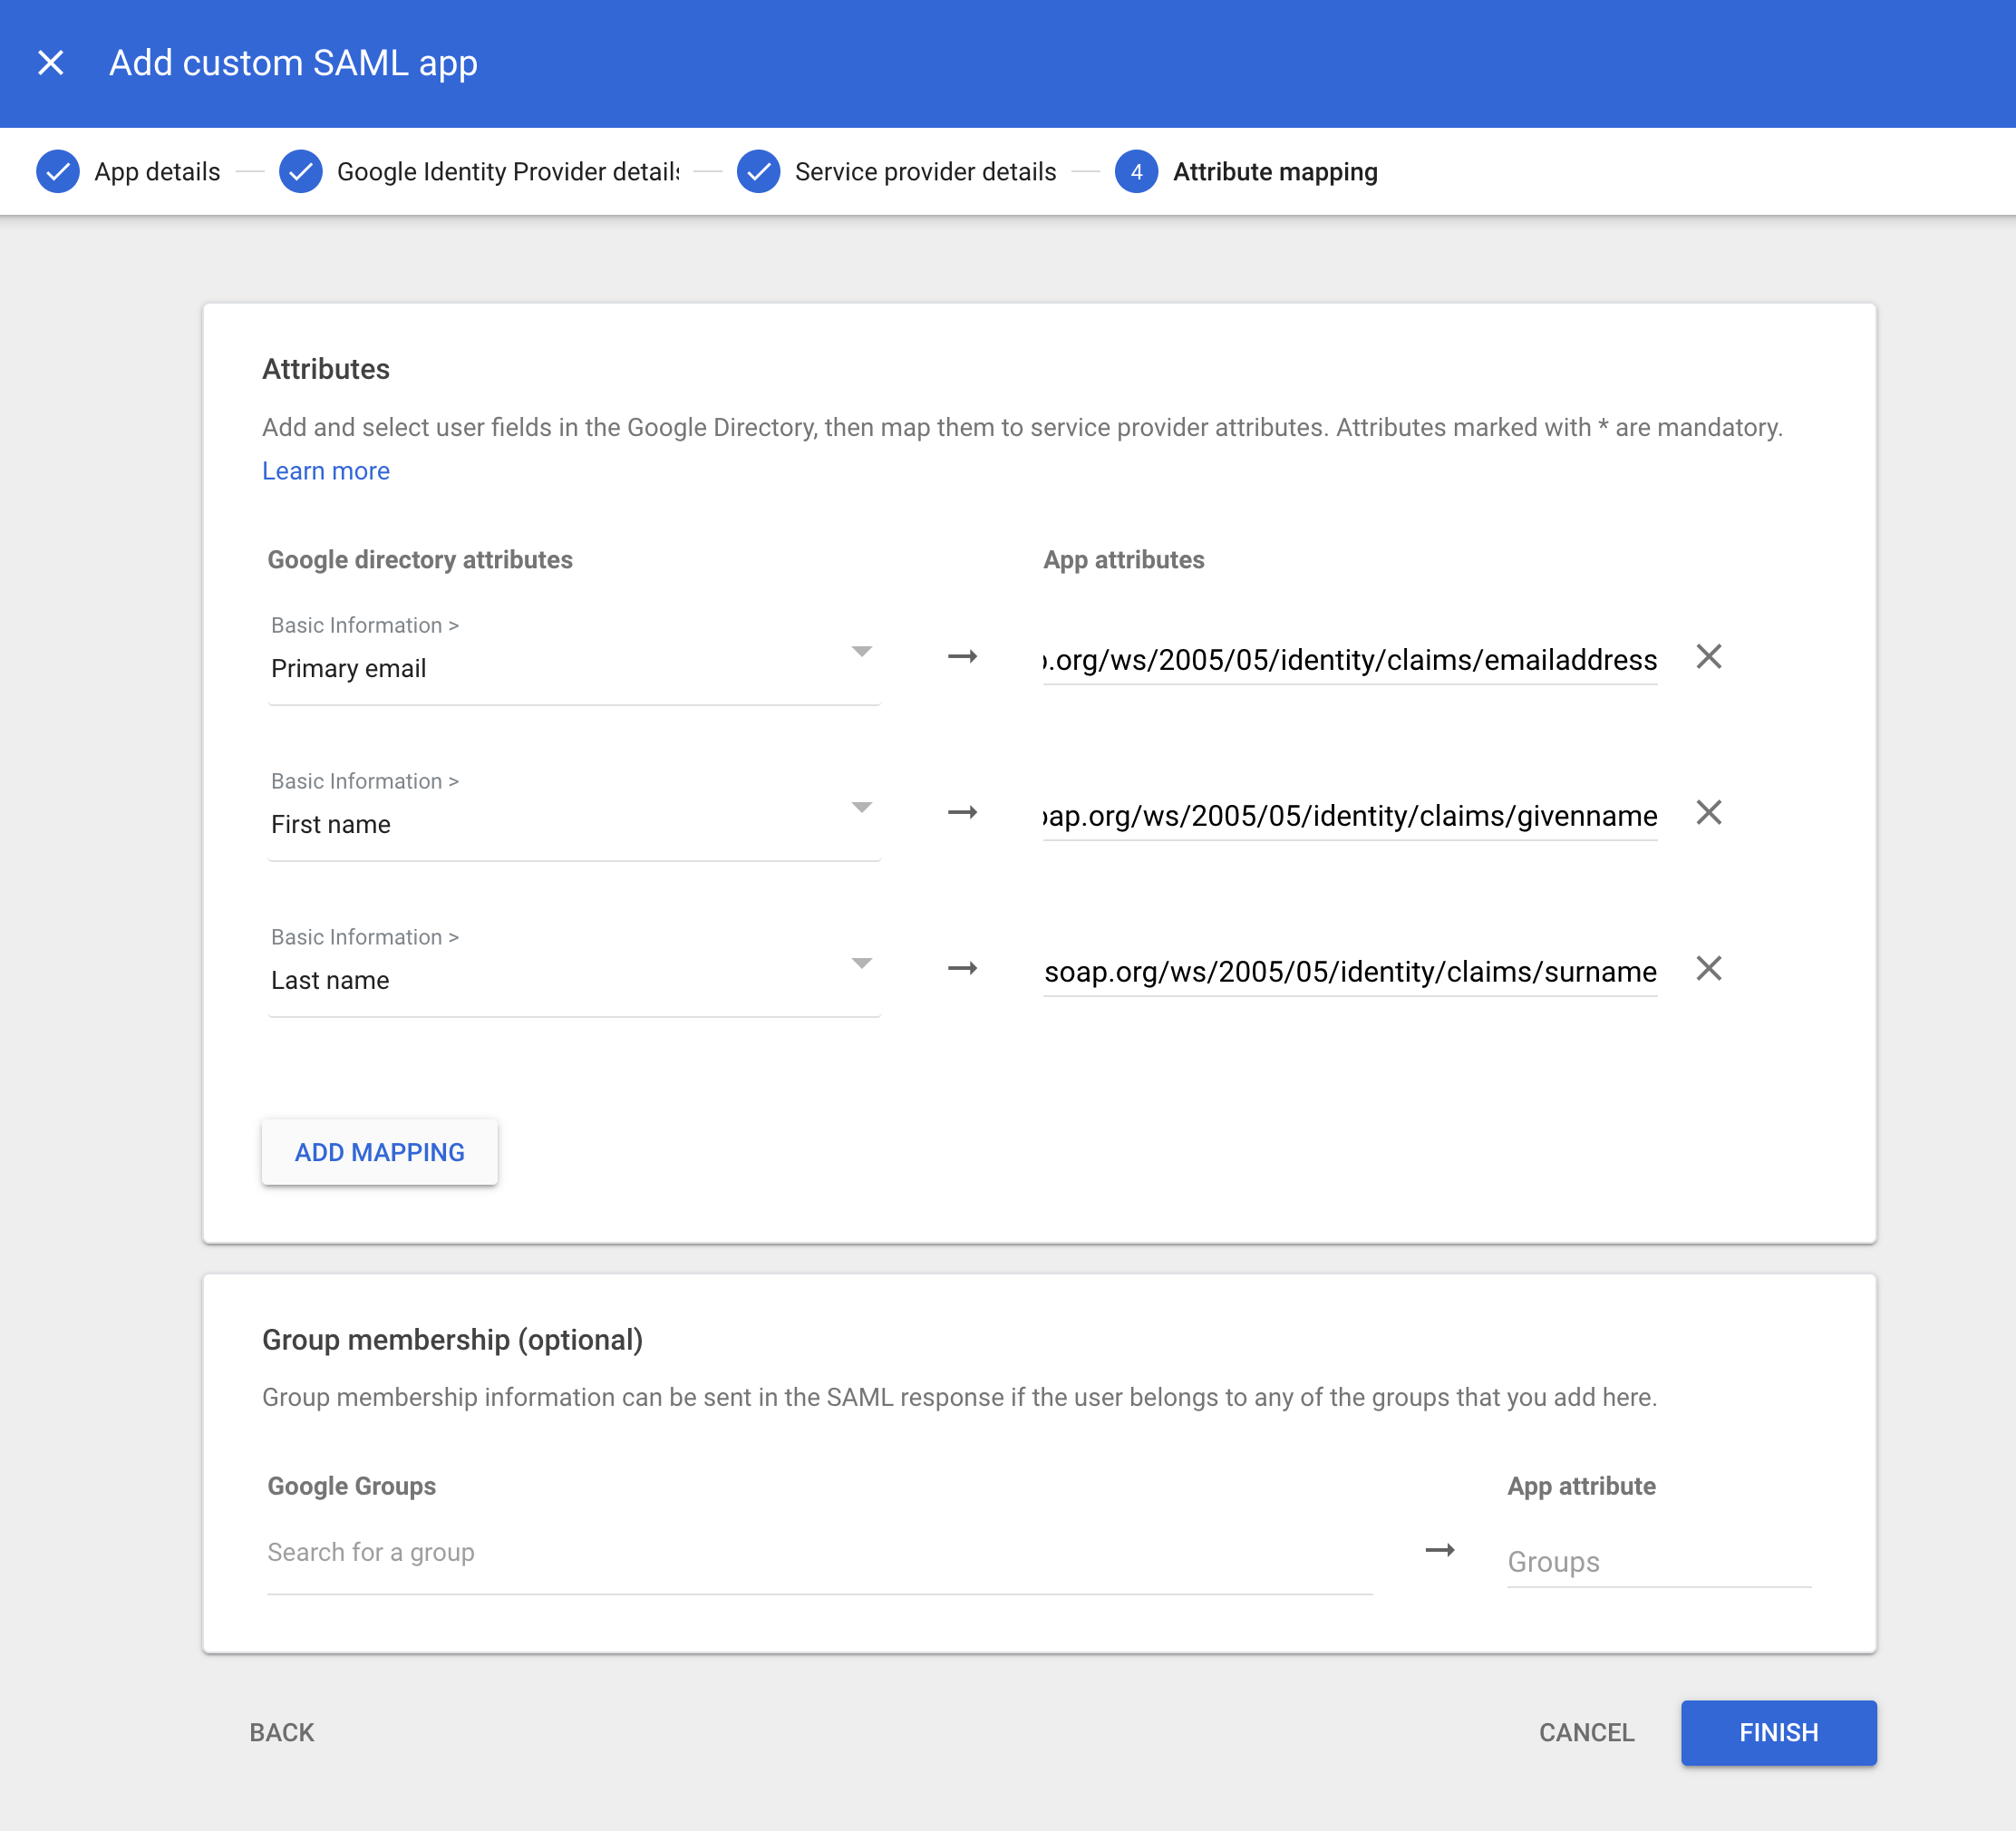
- In the Attribute mapping step, enter the following mappings:
| Google directory attribute | App attribute |
|---|---|
| Primary email | http://schemas.xmlsoap.org/ws/2005/05/identity/claims/emailaddress |
| First name | http://schemas.xmlsoap.org/ws/2005/05/identity/claims/givenname |
| Last name | http://schemas.xmlsoap.org/ws/2005/05/identity/claims/surname |

(To set up application roles, refer to the corresponding section below.)
- Click Finish.
You’ll now need to gather some configuration attributes in order to enable SSO in DMARCwise:
- In the SAML app page in the Google admin console, click on Service provider details and then Manage certificates.
Now, back to the DMARCwise SSO setup page, which you left at step 1:
- Click Next to proceed to step 2.
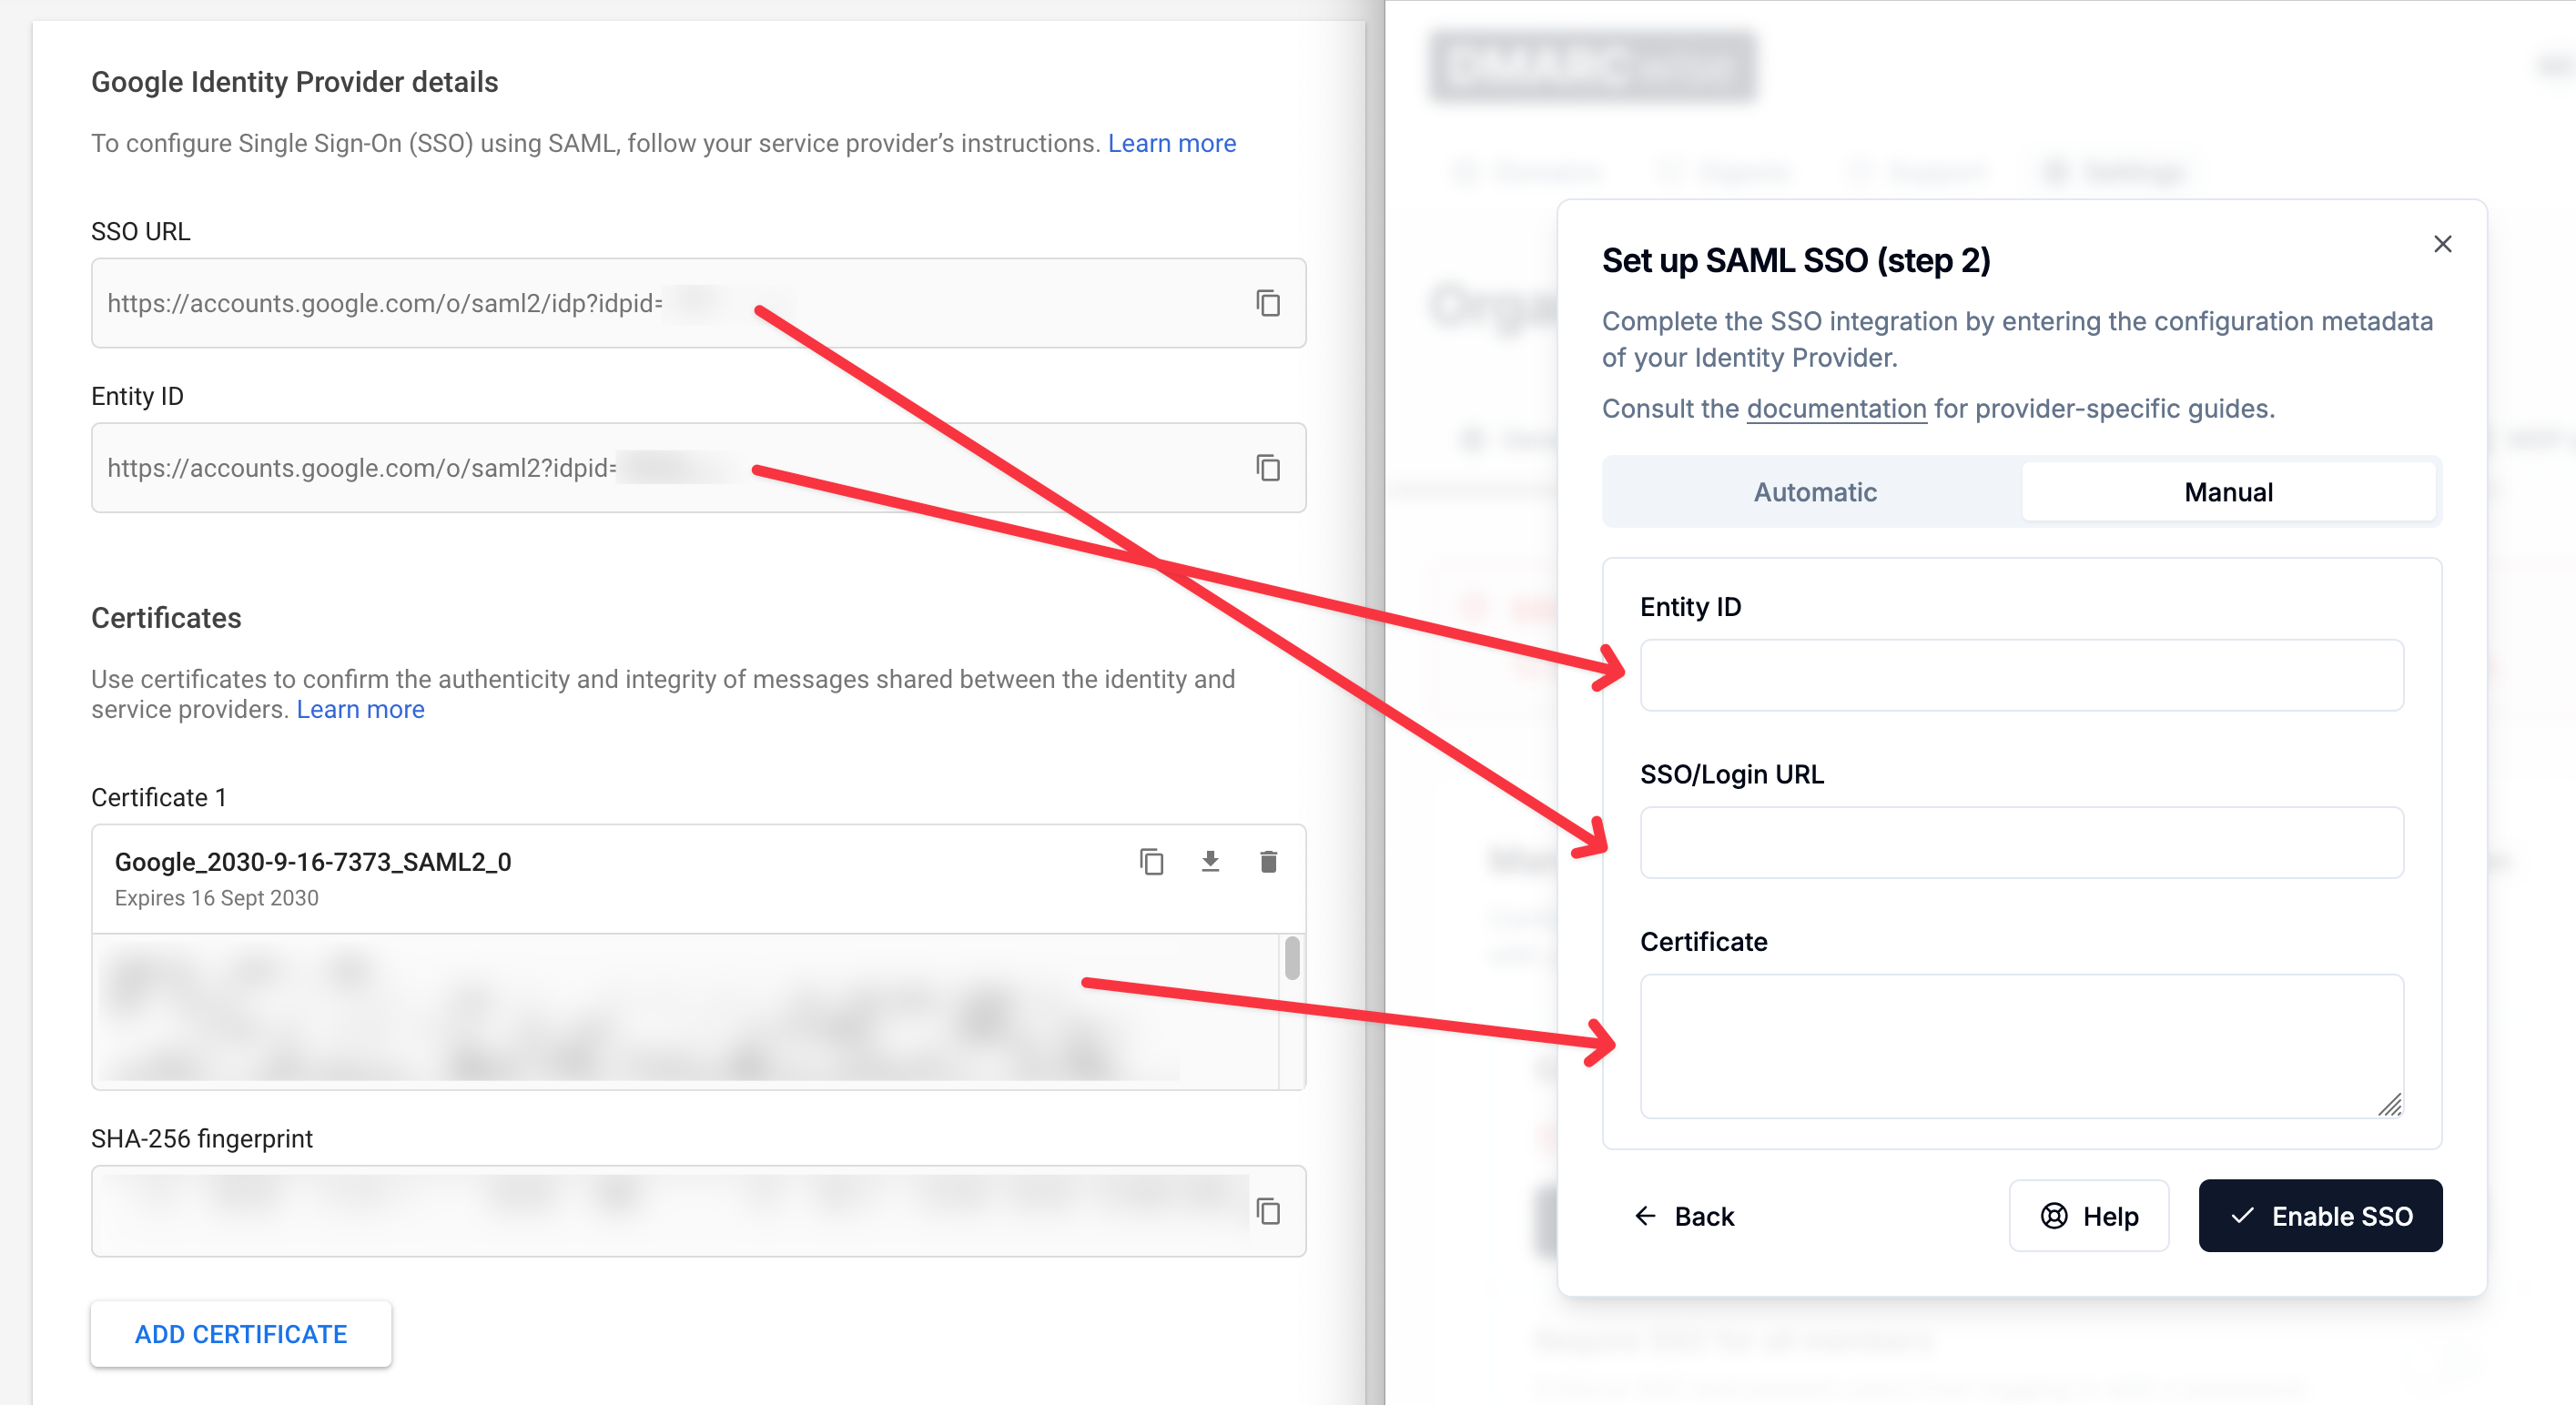
- Click Manual to switch to manual configuration.
- Copy the SSO URL, Entity ID and Certificate from the Google admin console to the corresponding fields in the DMARCwise settings:

- Click Enable SSO.
Find more information about testing and enforcing SSO in Setting up SSO.
Access control
By default, user access for Google SAML apps is off for all users.
To change this, navigate to the SAML app in the console and click on User access.
From there you’ll be able to:
- Allow access for all users in your Workspace account.
- Choose which groups or organizational units are allowed (through the sidebar items).
Setting up application roles
You can set up the Google SAML app to pass an application role to DMARCwise by using the urn:dmarcwise:role custom SAML attribute.
One way of doing this is the following:
- Create a new custom attribute in Directory → Users → More options → Manage custom attributes:
- Category: DMARCwise
- Custom field name: Role
- Info type: Text
- Visibility: Visible to user and admin
- No. of values: Single value
- In Users, choose a user for which you want to set the DMARCwise role and enter the role name as the value of the attribute you just created in the User information section. The following roles are supported:
AdminMemberBillingViewer
- In Apps → Web and mobile apps, choose the DMARCwise SAML app and create a new SAML attribute mapping as follows:
| Google directory attribute | App attribute |
|---|---|
| Role | urn:dmarcwise:role |
DMARCwise will assign and sync the role when the user logs in with SSO.
